Post by BrutalAce on Aug 15, 2017 5:59:43 GMT
Hi guys,
I have noticed that a lot of new and even seasoned modders make a lot of mistakes while handling SFV normal maps because the way Unreal Engine handles normal maps is different compared to many other engines, in this guide I am going to share some best practices on how to work with SFV normal maps.
NOTE: This tutorial is an ongoing guide so it will be updated as I find time to share more techniques.
PREREQUISITES:
1. Basic modding knowledge including SFV file names and directory structure.
2. Gildor's UModel (get it here).
3a. Photoshop with Nvidia DDS plugin (get Nvidia DDS plugin here).
3b. GIMP with DDS plugin (get GIMP here and DDS Plugin for GIMP here).
NOTE: Choose either GIMP or Photoshop, this tutorial assume that you're using Photoshop.
4. HxD hex editor (get it here).
BEST PRACTICE ONE: EXTRACTING NORMAL MAP CORRECTLY.
A. First get a normal map UASSET file, for this tutorial I'll am using Chunli's C1 normal map namely CT_CNL_01_NORMAL.UASSET
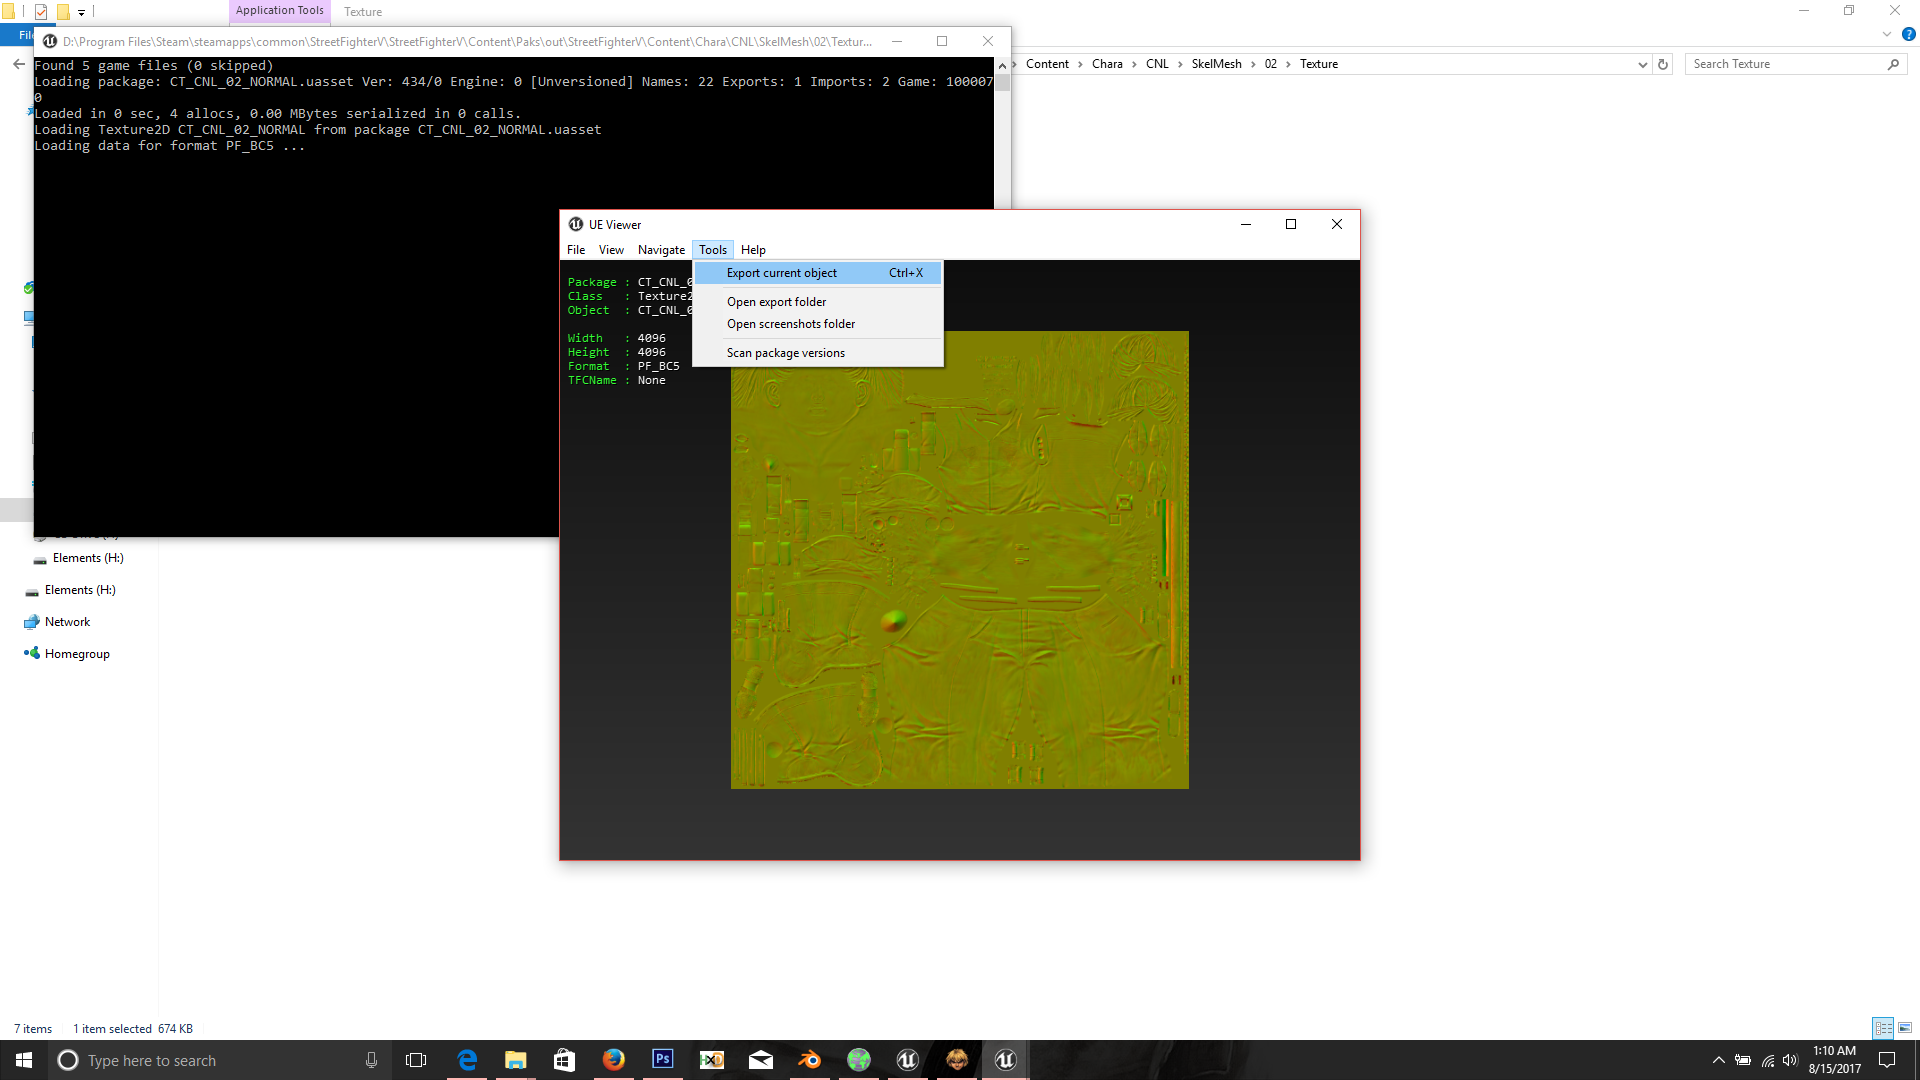
B. Extract the normal map using Gildor's UModel as shown in the image below.
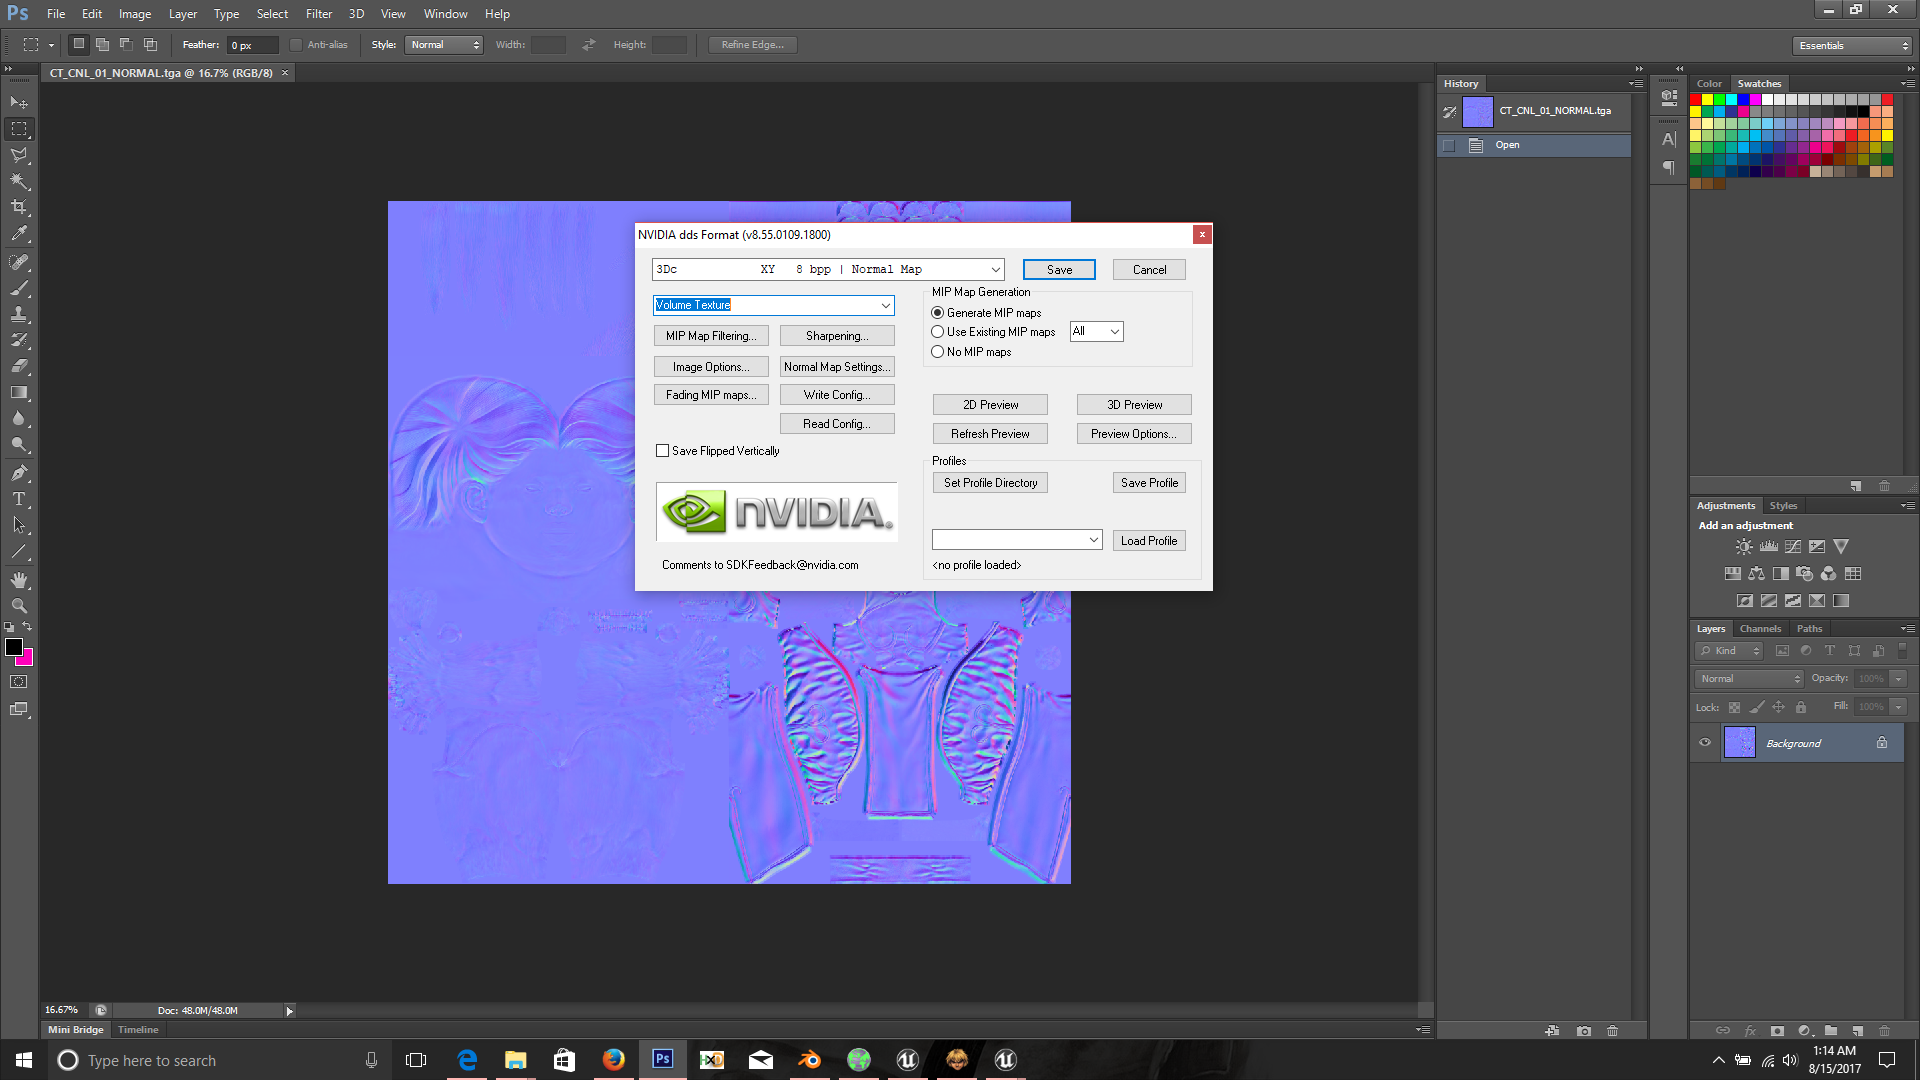
C. This will give you a TGA file namely CT_CNL_01_NORMAL.TGA, open this file in Photoshop and save it as a DDS file with following format.
Normal map files are usually big with 4096x4096 resolution so it might take few seconds to save, I recommend working on an SSD to speed up your modding process specially when working with large files.
D. After saving you should have a file namely CT_CNL_01_NORMAL.DDS, now open this file in HxD hex editor as well as the original UASSET file that you opened in step A i.e CT_CNL_01_NORMAL.UASSET, you should have both files there like this.
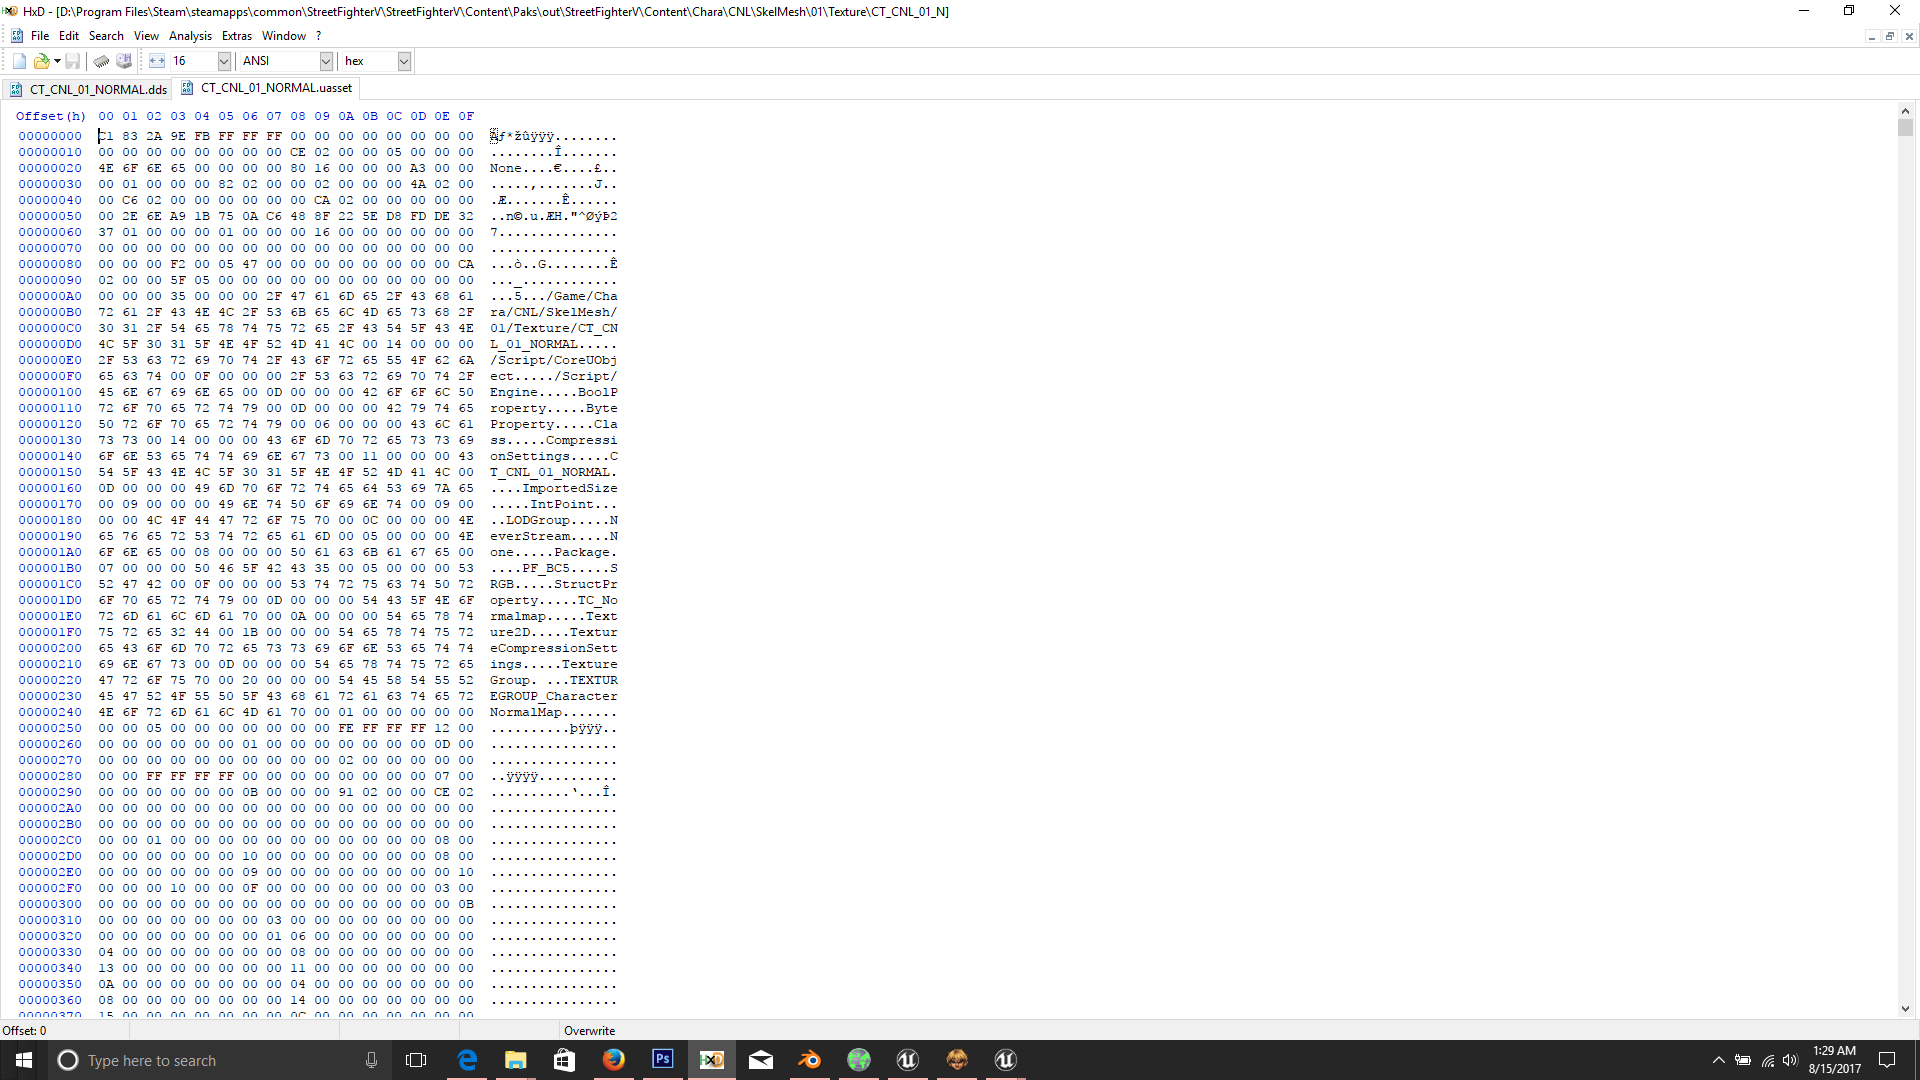
The reason we are opening both files is because when we extracted the normal map using UModel in step B, it flips the red and green channels, you don't want that because that will end up making your textures look bad in game, I have no idea why UModel does that or whether it's a bug but in any case we are going to fix that in next step.
E. We will copy the original DDS data from UASSET file and paste it in the DDS file we saved in step C so basically we will avoid what UModel did while extracting the file.
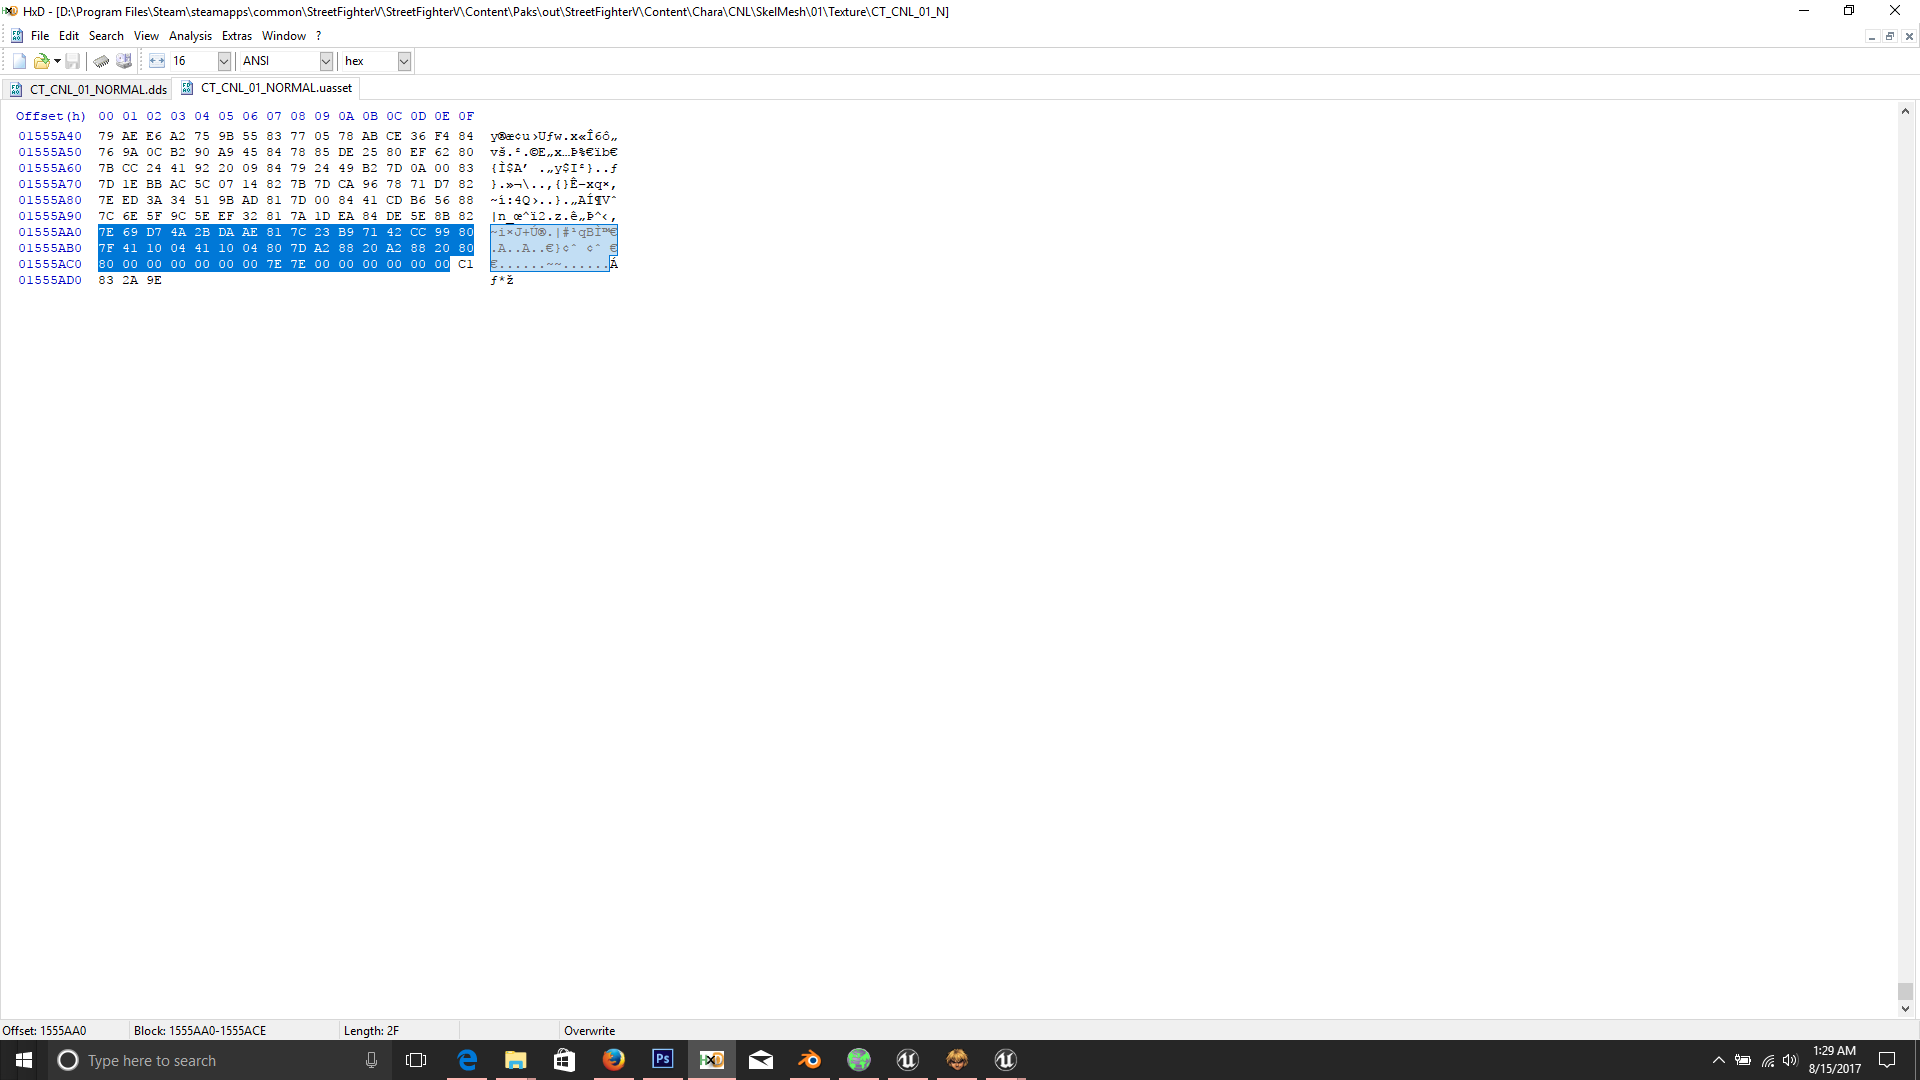
First start selecting the data from bottom of UASSET file (CT_CNL_01_NORMAL.UASSET) leaving last four blocks which are usually C1 83 2A 9E as shown in image below.
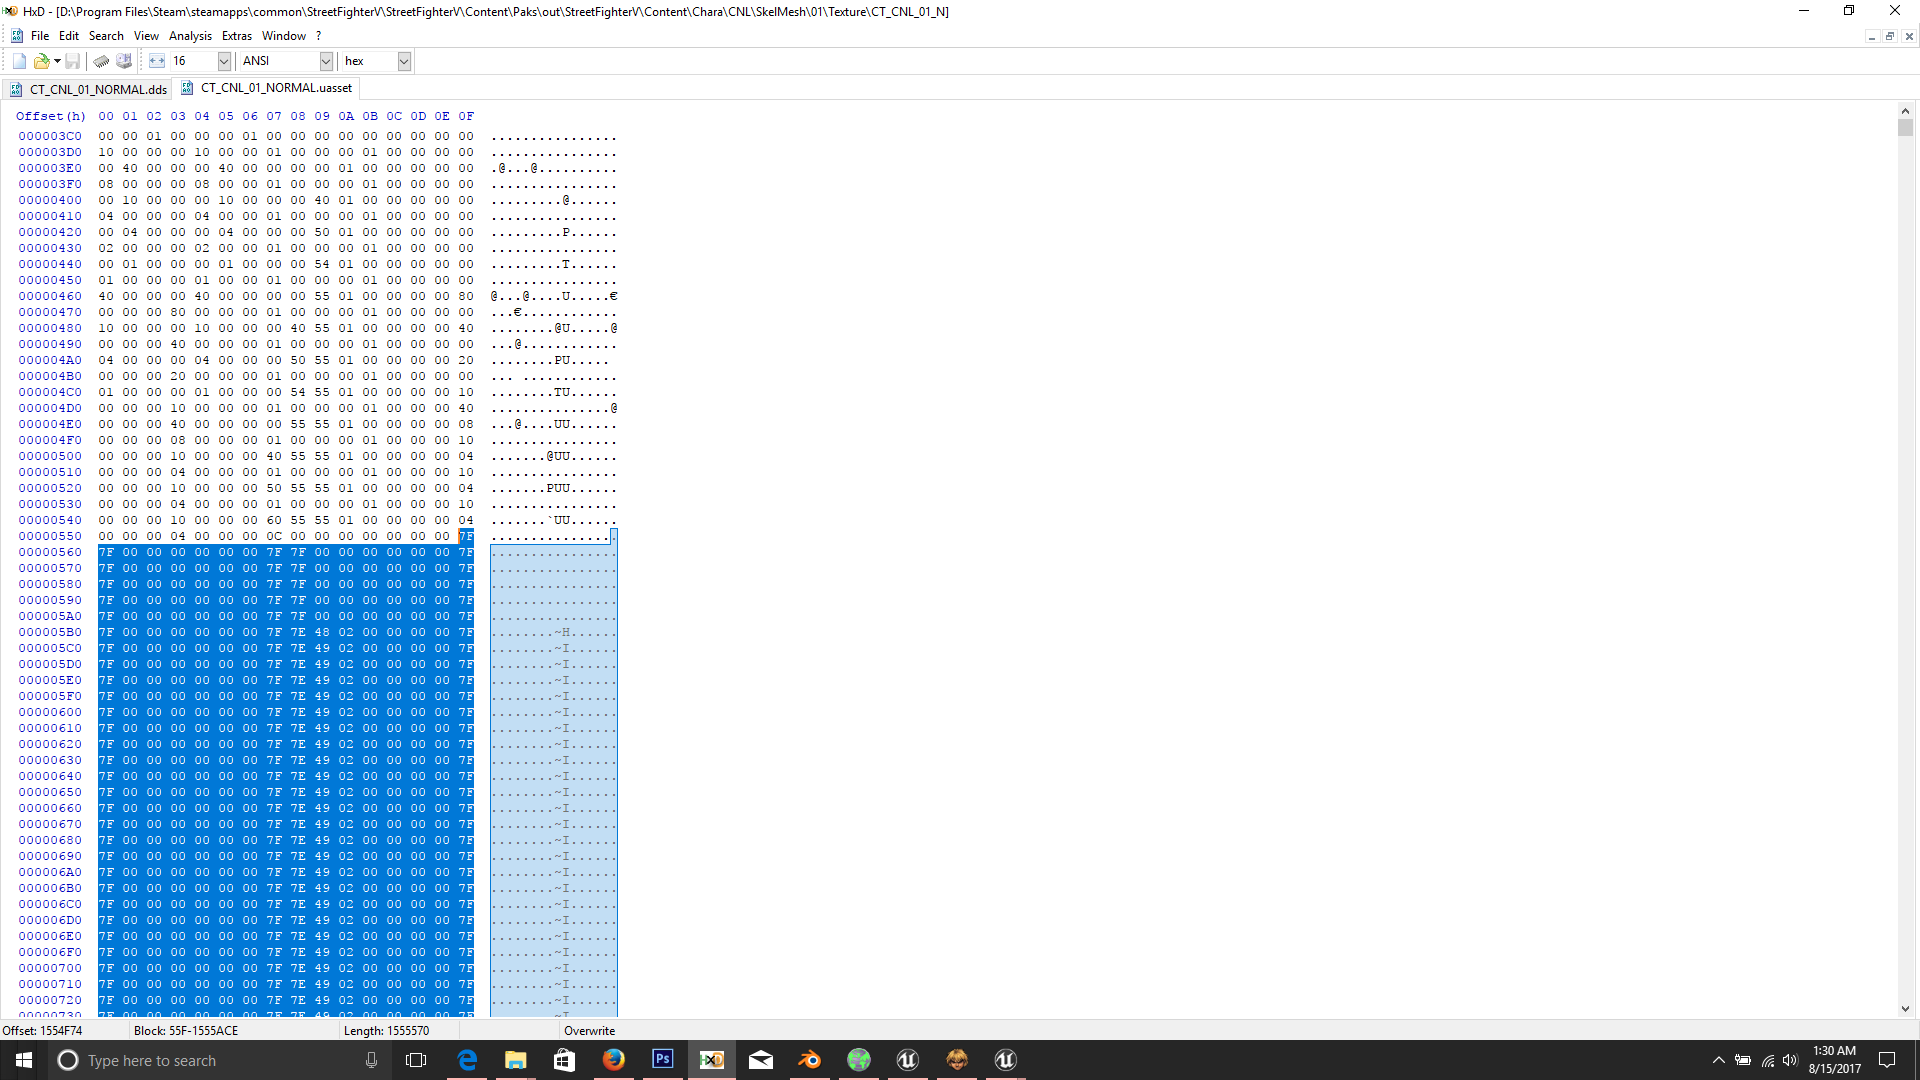
Now go all the way up until your data length gets to 1555570, this is the length of a 4096x4096 normal map containing mip maps, there are many instances where you'll get a normal map of different size such as hair normal maps which are usually smaller or sometimes Capcom artists does mistakes like not saving a normal map with mip maps which also reduce it's size slightly, in that case the size will be different and you'll have to determine where the correct offset is, with enough practice it's quite easy to understand where the DDS data is starting so practice with as many files as you can.
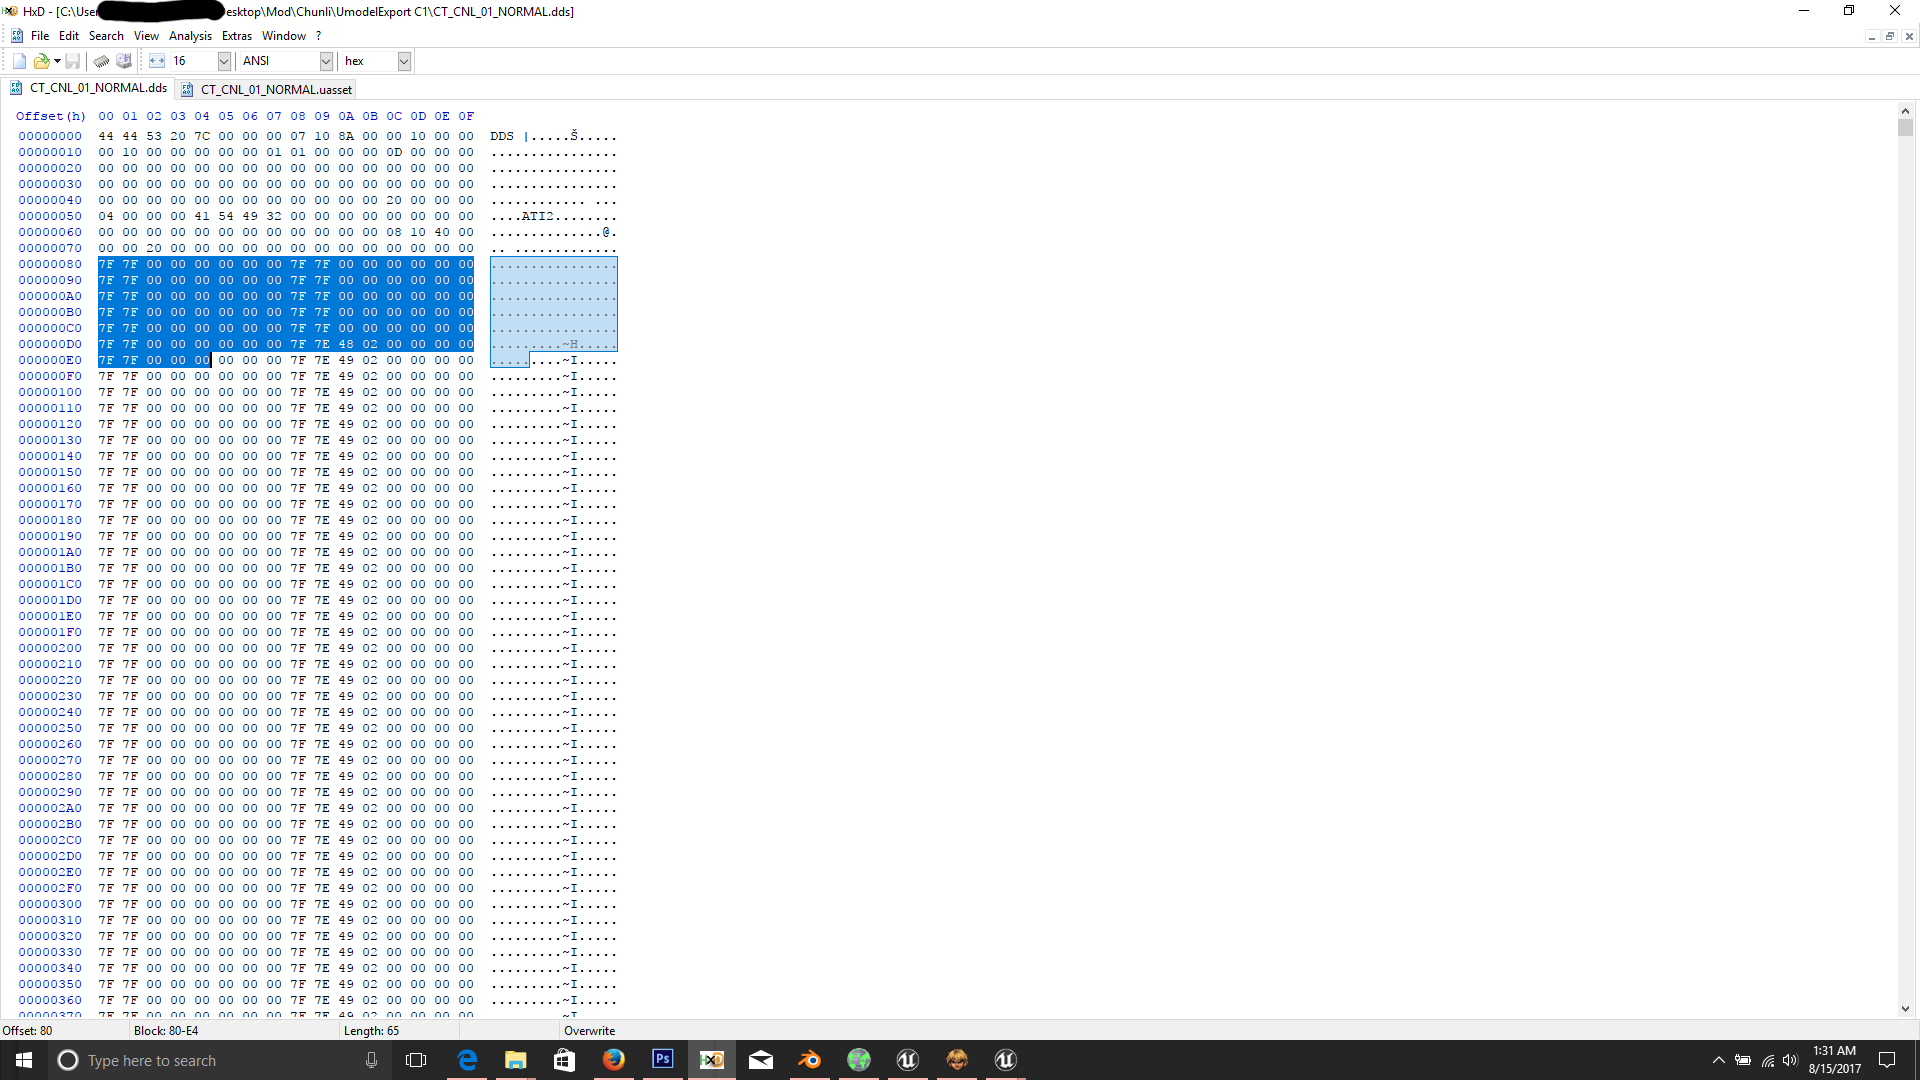
Copy the selected data then switch to DDS file (CT_CNL_01_NORMAL.DDS) then start selecting the data from offset 80 as shown in image below
And go all the way down to the end of file, this should give you the same 1555570 length that you copied before.
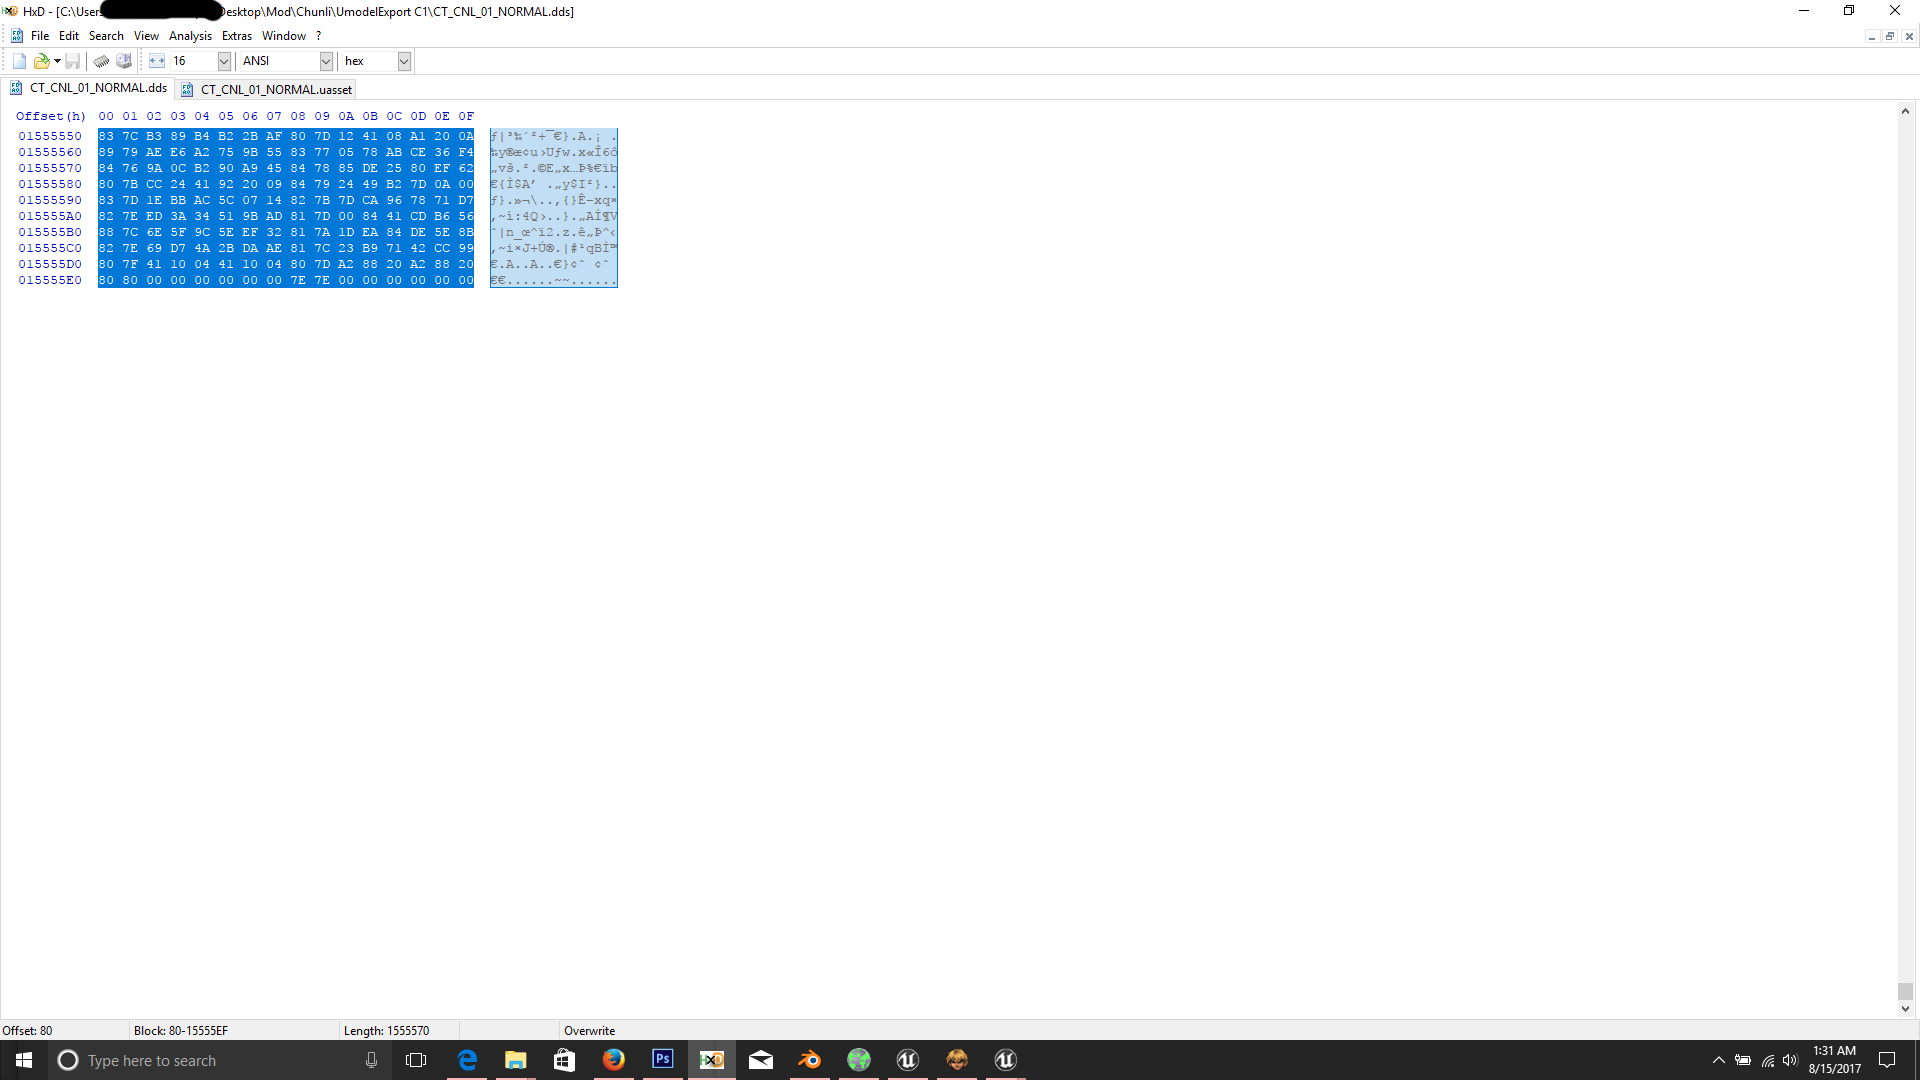
Now paste the data that you copied as shown below and save the file.
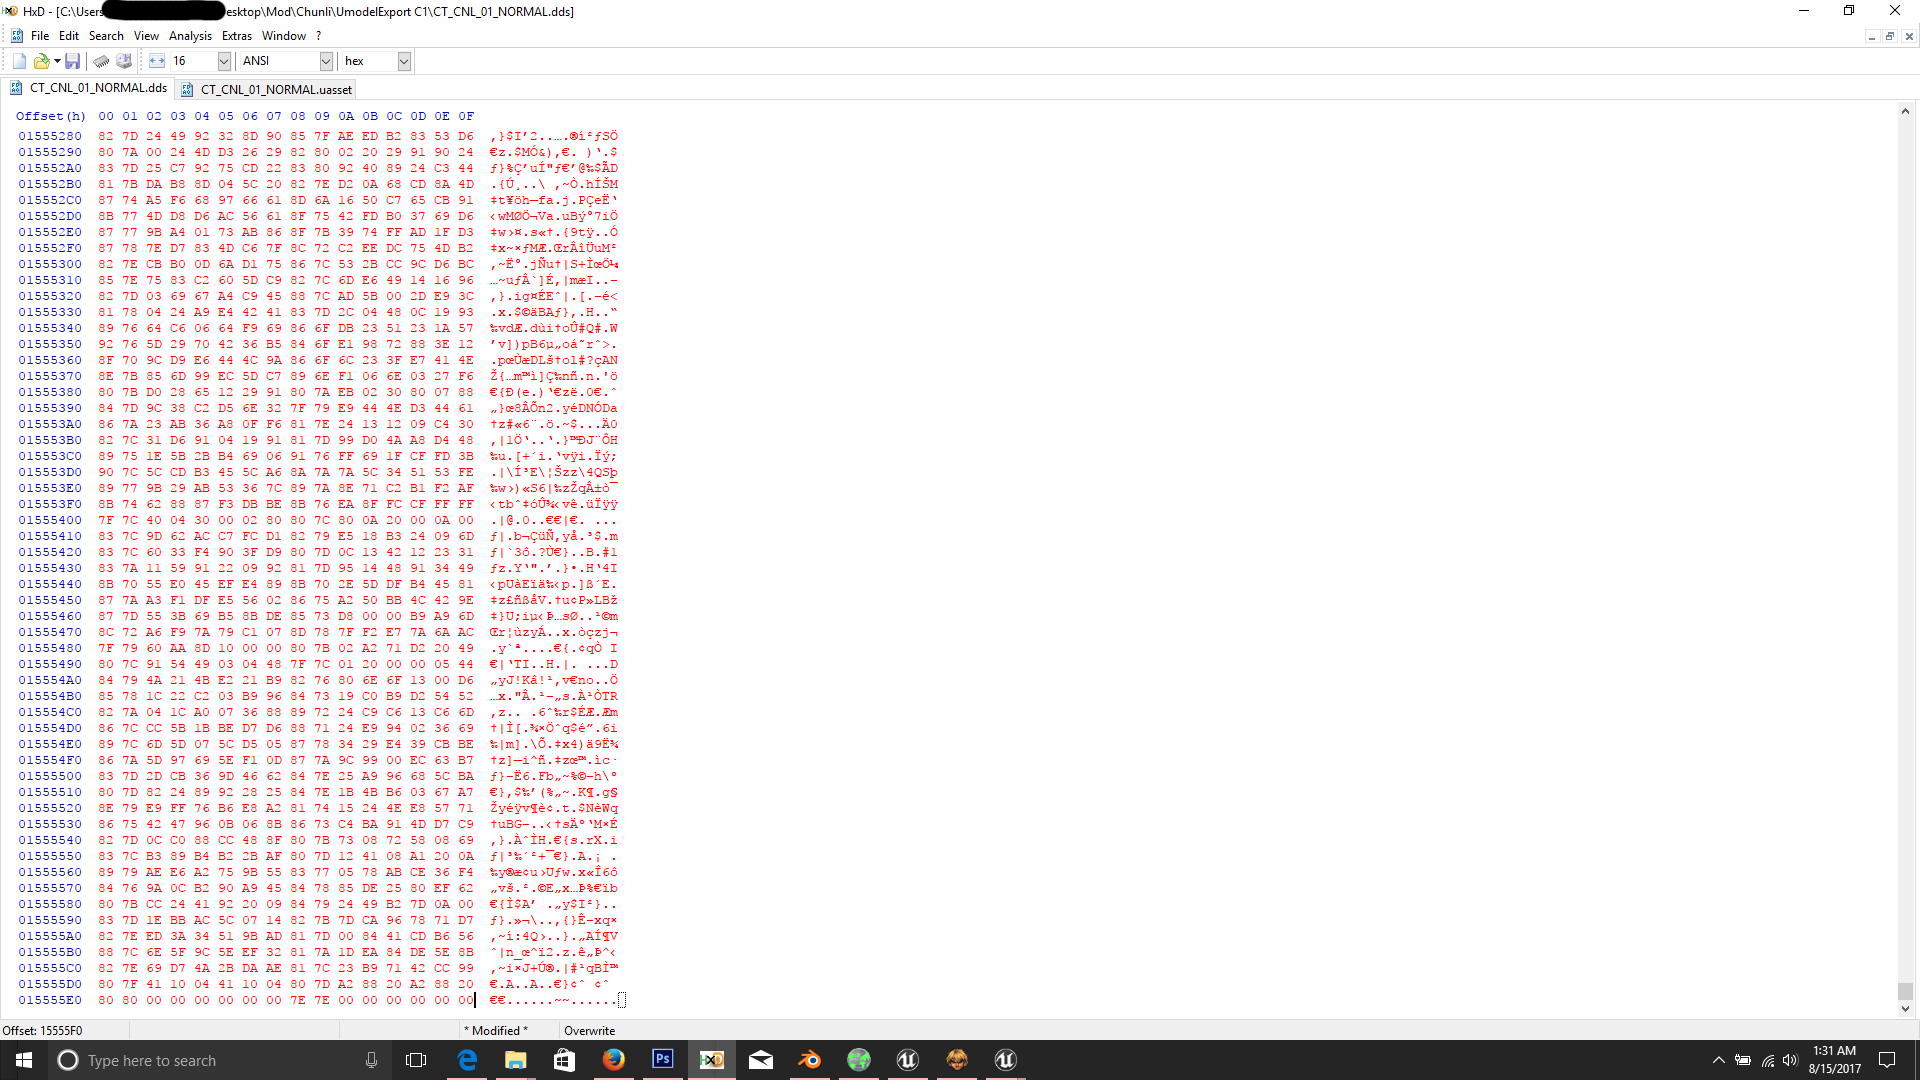
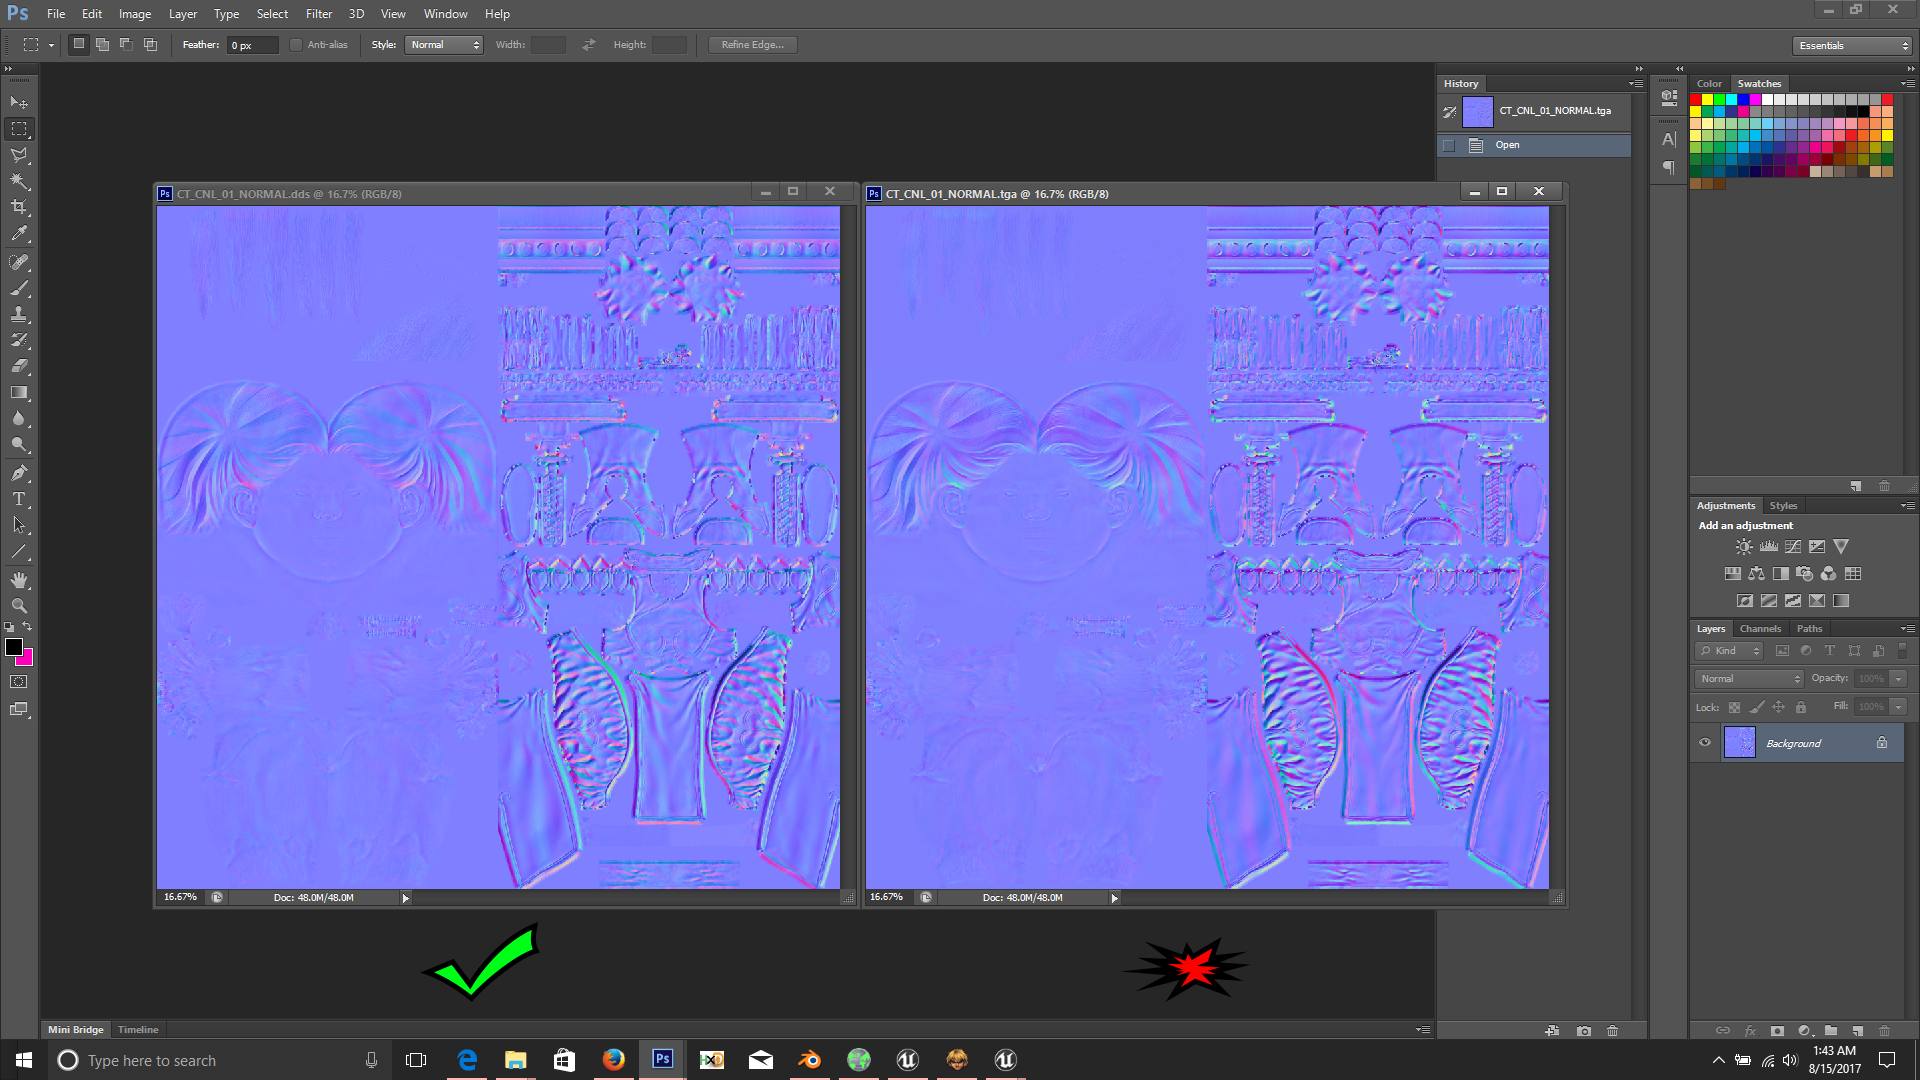
Finally open the saved DDS file in Photoshop and you'll notice a difference compared to the TGA file that you extracted using UModel, the DDS normal map is the correct normal map that you should use for editing or whatever you like.
I have noticed that a lot of new and even seasoned modders make a lot of mistakes while handling SFV normal maps because the way Unreal Engine handles normal maps is different compared to many other engines, in this guide I am going to share some best practices on how to work with SFV normal maps.
NOTE: This tutorial is an ongoing guide so it will be updated as I find time to share more techniques.
PREREQUISITES:
1. Basic modding knowledge including SFV file names and directory structure.
2. Gildor's UModel (get it here).
3a. Photoshop with Nvidia DDS plugin (get Nvidia DDS plugin here).
3b. GIMP with DDS plugin (get GIMP here and DDS Plugin for GIMP here).
NOTE: Choose either GIMP or Photoshop, this tutorial assume that you're using Photoshop.
4. HxD hex editor (get it here).
BEST PRACTICE ONE: EXTRACTING NORMAL MAP CORRECTLY.
A. First get a normal map UASSET file, for this tutorial I'll am using Chunli's C1 normal map namely CT_CNL_01_NORMAL.UASSET
B. Extract the normal map using Gildor's UModel as shown in the image below.

C. This will give you a TGA file namely CT_CNL_01_NORMAL.TGA, open this file in Photoshop and save it as a DDS file with following format.

Normal map files are usually big with 4096x4096 resolution so it might take few seconds to save, I recommend working on an SSD to speed up your modding process specially when working with large files.
D. After saving you should have a file namely CT_CNL_01_NORMAL.DDS, now open this file in HxD hex editor as well as the original UASSET file that you opened in step A i.e CT_CNL_01_NORMAL.UASSET, you should have both files there like this.

The reason we are opening both files is because when we extracted the normal map using UModel in step B, it flips the red and green channels, you don't want that because that will end up making your textures look bad in game, I have no idea why UModel does that or whether it's a bug but in any case we are going to fix that in next step.
E. We will copy the original DDS data from UASSET file and paste it in the DDS file we saved in step C so basically we will avoid what UModel did while extracting the file.
First start selecting the data from bottom of UASSET file (CT_CNL_01_NORMAL.UASSET) leaving last four blocks which are usually C1 83 2A 9E as shown in image below.

Now go all the way up until your data length gets to 1555570, this is the length of a 4096x4096 normal map containing mip maps, there are many instances where you'll get a normal map of different size such as hair normal maps which are usually smaller or sometimes Capcom artists does mistakes like not saving a normal map with mip maps which also reduce it's size slightly, in that case the size will be different and you'll have to determine where the correct offset is, with enough practice it's quite easy to understand where the DDS data is starting so practice with as many files as you can.

Copy the selected data then switch to DDS file (CT_CNL_01_NORMAL.DDS) then start selecting the data from offset 80 as shown in image below

And go all the way down to the end of file, this should give you the same 1555570 length that you copied before.

Now paste the data that you copied as shown below and save the file.

Finally open the saved DDS file in Photoshop and you'll notice a difference compared to the TGA file that you extracted using UModel, the DDS normal map is the correct normal map that you should use for editing or whatever you like.


